copic markers

How To Draw Eyes by Deanna First

This is a fun one! Eyes are by far my favorite things to draw. In each of my sketches I start with the eyes even if it is a full body sketch. This “HOW TO” is going to be a fairly quick way to draw them. Depending on how much detail you would like in the sketch it could take 5 minutes or 5 hours. For this one we are going the minutes route.

STEP BY STEP

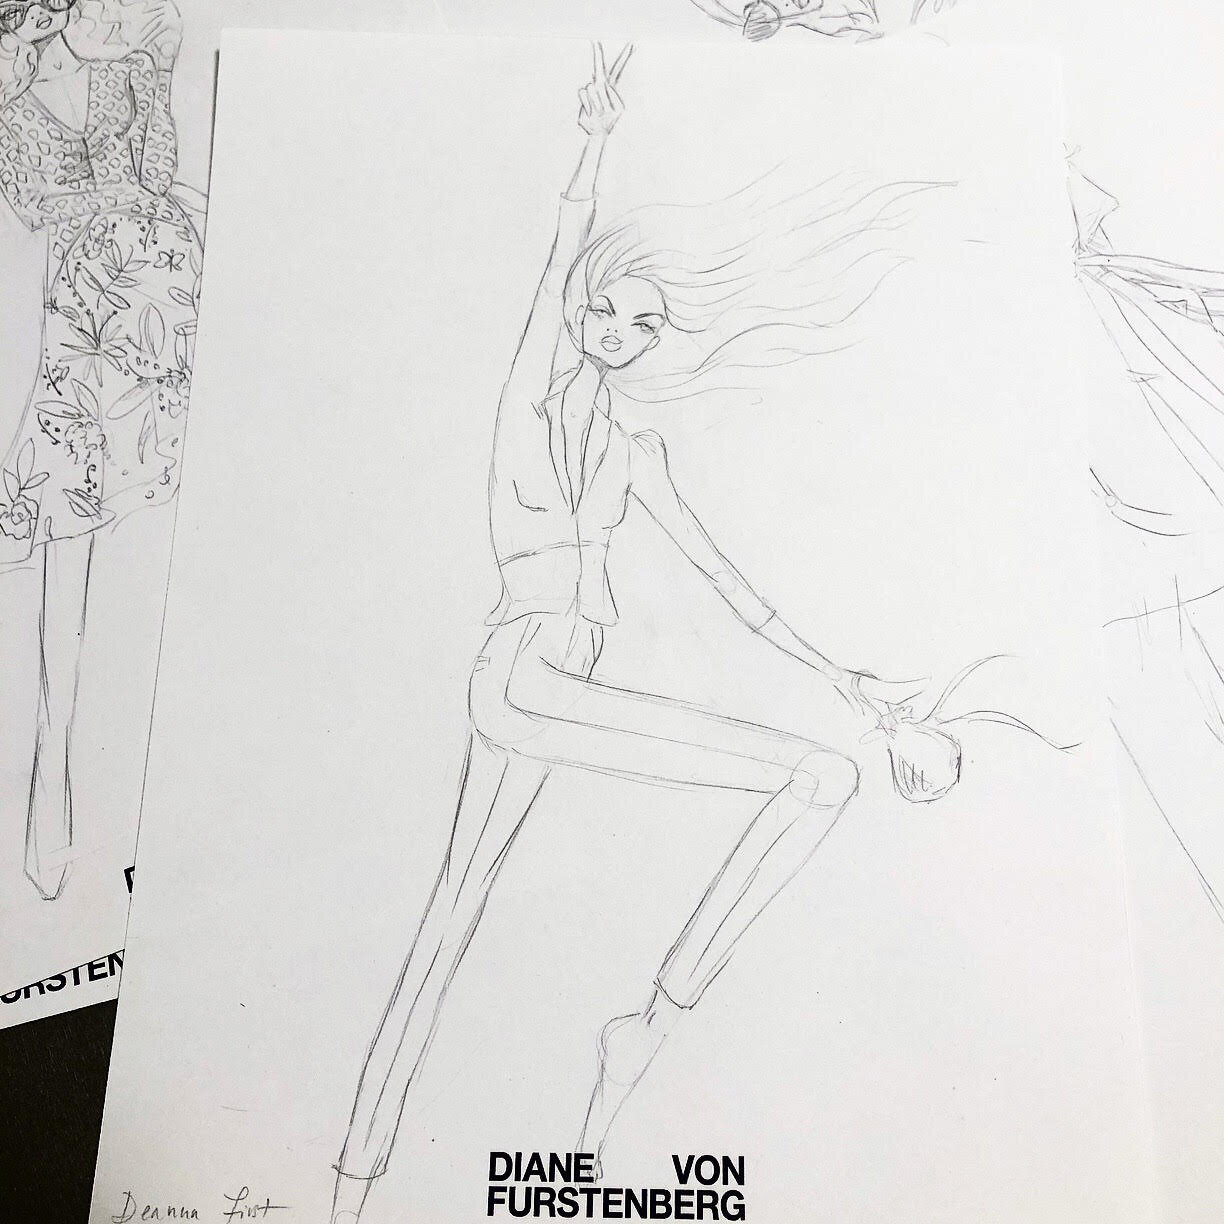
  1. First find a great photo reference. It could be from a magazine, Pinterest or even looking at the mirror would work just fine.

  2. I usually start with a pencil outline. Doesn’t even have to be a fancy pencil - I seriously love just a regular mechanical one. For this particular sketch I actually went straight in with ink tho. It is kind of a freeing to start with ink since there is no going back. I do try and start with lighter shades tho in case I don’t like the proportion I can layer darker colors on top and it will disappear.

  3. Ok, after you have the eye shape down I like to go in with microns. You can also use an extra fine point sharpie for this too. If want to go the micron route you can buy them at Blick.

  4. Next I go in with more copic markers. I like the soft brush side on these. It gives sort of like a watercolor effect. I add eye color and more shades of skin tone under the eye and on top of the eyelids.

  5. I always like to add a light shade of pink in the inner corner of eyes. This somehow gives the sketch a more lively appearance. It’s also included in the skin tone set of copic markers I linked in step 4.

  6. I love white charcoal better than white colored pencils when adding highlights to my sketches. It pops a bit more in my opinion. I add white accents to inner eyes (just a few small specks) you DO NOT need to make each eye look identical. This is a habit some people fall into. Each eye is not exactly the same on a person so the imperfections sometimes make it even more realistic! More white can go in the middle of the eyelid. I just blend it with my finger.

  7. Next, I love to add light grey shading right below the top lash line and the bottom lash line.

  8. For the brows on this piece I did watercolor but usually just do small lines upwards using my .005 black micron. You can find these at Blick Art Supplies and a bunch of other spots.

    If you have tried this and have had success please tag me @deanna_first on IG I would LOVE to see! Hope this helped. If have any questions comment below. :)

Special Project for DVF inspired by Diane by Deanna First

I’m SO thrilled to be sharing a little more about my process with you and what inspires me along the way!

This will be #1 of several sketches I will unveiling for an exploration project that Diane von Fürstenberg herself asked me to create! Yes - I still can’t believe I just typed that. I think back when I first decided to go freelance and compare it to the life I’m living now and it is just insane. I never really think about it until I catch myself reflecting back on the past.

dvf X deanna first sample 1.jpg
dvf X deanna first wip sample 1 copy.jpg
dvf X deanna first sample 1 pencil.jpg

Inspiration came easy when looking into #WomanInCharge movement as a theme and Diane’s strength and iconic style. I gravitated towards powerful poses and movement in my sketches to capture that on the go lifestyle and hard work ethic that the modern day woman embodies.

dvf inspo1.jpg

The Winona Stretch Crepe Peplum Jacket by #DVF below was paired with a matching spice and black printed pant. The pant is not part of their collection but I am a sucker for a matching suit so tweaked the sketch a bit.

Screen Shot 2020-02-04 at 11.33.02 PM.png

MY PROCESS

Step 1. I started by sketching in pencil. Honestly, I love a good mechanical pencil. I own all of the fancy professional kind but gravitate towards the ones I used in college.

Step 2. I scan in my artwork multiple times. This allows me to PLAY! If I mess up the entire sketch isn’t ruined when I go to ink it and can try out different techniques and shading on each scan.

Step 3. The fun part is always adding color for me. I use a mix of micron pens, colored pencils and copic markers. For hair and eye color I usually do a blend of colored pencils.

Step 4. Shading. I always go over my artwork by adding shading with a very light shade grey marker. I usually do under the feet, neck and anywhere I see fit that could use a little contrast.

Step 5. I actually didn’t do step 5 for this one since they were just samples - but I usually scan inked version into photoshop and play with colors and add different layers of colors. I use dodge and burn tool to further shade.

As you can see don’t be fooled by my 5-7 minutes sketches during my live events. To create a beautiful piece of artwork takes steps and patience to get it right.


The Infinite Aura Collection Launch with Swarovski X House Beautiful by Deanna First

Last week I found myself live sketching with amazing views looking over New York City while at the Hearst Tower. We celebrated the launch of the gorgeous Infinite Aura Collection with Swarovski and House Beautiful! I was honored to meet Editor in Chief Sophie Dow Donelson at the event! Below are a few images from the night taken by Avano Hisa.

deanna first live sketch swarovski.jpg
swarovski lighting .jpg
live sketch swarovski2.jpg
live sketch swarovski.jpg
051618-065-Swarovski-Hearst-PhotoByAyanoHisa_preview.jpeg

Below is a sample background I created prior to the event. I used micron, pencil and digital editing to create the Swarovski back drop. I also hand glued Swarovski crystals to add accessories and a touch of sparkle to each illustration. They take roughly 5-8 minutes per sketch to create. Big thanks to Kailin Villamar and the rest of the team for having me!

Infinite Aura Collection_Final Background Deanna First.jpg